WHAT?!?!? I am linking up FOR ANOTHER AMAZING LINK-UP with some pretty fan-tab-ulous teacher bloggers to bring you SmAsHiNg StRaTeGiEs!! This is a monthly link-up that we are bringing you for helping in teaching guided reading! I hope you are as excited as I am!! Special shout-out to Allison from Partyin' with Primaries for organizing this!
If you missed last months' SmAsHiNg StRaTeGiEs you can check it out HERE.
Phonics is the way I have always taught reading. However, as a child, I was taught whole language. In case you aren't familiar with whole language, it's more memorizing and recognizing parts of a word. I was never taught to 'decode' words, I just remember being taught words. When I became a teacher, learning phonics and the rules behind them, I was so enlightened!! I thought about all the people my age that learned to read with whole language and how much they missed out because they didn't learn phonics and phonemic awareness to the degree that I, and many other teachers, teach it.
I teach first grade in a public school in Maryland. Most students entering first grade know and identify letters and letter sounds. We spend the first 2-3 weeks reviewing letters and letter sounds and then we also review putting them together in CVC (consonant-vowel-consonant) words. We 'tap' the sounds out and then blend them together to read them. With a word like cat we would tap /c/ /a/ /t/ and then say CAT.
One of the ways we practice reading CVC words is with these TWIST and TURN 3 Letter word builders from LakeShore Learning. I create a word, like DIP, and then I change the initial consonant (HIP, TIP, SIP). Once the students get the hang of it that the words rhyme, I switch to a different vowel and ending sound. Then I will try with the same word, DIP, and just changing the vowel and having students read it that way (DOP, DAP, DEP). Finally we will blend the same word DIP and change only the final consonant (DIB, DIG, DIN).
I also have a bin of rhyming words. Each rhyming pack is on a ring, like the -at pack shown, and students flip through and read each word. I also have a minute sand timer, and students see it as a challenge to 'beat the clock'.
Another simple activity I have on my word work table is my "Making words' bin. I have little plastic tub filled with these alphabet bracelet making letters. I found them on clearance at Hobby Lobby! Within small group, I will create a CVC word for them, then I will change the initial sound. Once they have been able to do that, I will switch to changing the vowel, and then ending sound. After I've introduced them to this in small group, I put it in the word work area and I give students a recording sheet to record their word building chain. They love the challenge!
These foam cubes are probably one of my students favorite word work activities. I will build a word, and if students can read it, I have them try to add a word to create a chain (kind of like Scrabble). They like the idea of building a tower.
Once the students are pretty well with tapping and decoding CVC words, I introduce them to these write and wipe CVC picture cards. Printing these on card stock and laminating has really helped them to have a longer shelf life!! My students enjoy spelling the picture and then reading it to their partner. They turn everything into a competition and try to see who can get more.
So a blend is two consonants beside each other in a word. A blend can be at the beginning of the word, or the end. Some blends are st, sl, sk, sm, sc, sp, sn, br, dr, gr, fr, pr, tr, bl, cl, fl, gl, pl, tw.
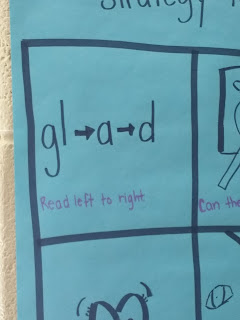
Behind my guided reading table, I have this anchor chart hanging. I try to encourage my students to use different strategies to figure out unknown words.
For working with consonant blends, I remind them to read from left to write and look for chunks. We continue to tap out the word and then blend it together.
During our independent centers/ rotations/ word work time, we often refer to our "What do good readers and writers look like?" This is a chart with pictures of them on it. We review with this chart to help remind us what we should be doing during our rotation time while completely independent activities. I really think it helps them since it's pictures of THEM doing the right things!
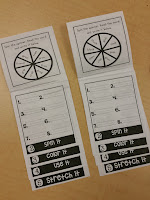
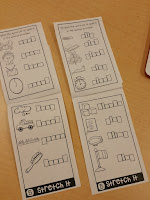
My students have really enjoyed working with flipbooks, so to help review blends, I created double sided flip books to review beginning blends, as well as ending blends. I actually created this for my students to work independently as I tried to get the end of the marking period running records completed.
Make sure to check out the other great SmAsHiNg StRaTeGiEs from the great teacher bloggers below!! Happy Spring!!


Great strategies! Thanks for sharing!!
ReplyDeleteAwesome Ideas!
ReplyDeleteThis is a great post! Thank you so much for all of the info. :)
ReplyDeleteGreat ideas...thanks for sharing!
ReplyDeleteGreat strategies! Awesome ideas.
ReplyDeleteOur class loves the twisty words, too! I really like your visuals for the reading strategies! :)
ReplyDeleteI love how you used the foam cubes! I have a few packs of those right now that I haven't figured out how to use yet! :)
ReplyDeleteGreat strategies that are now easy to implement with your explanations. Thanks for sharing!
ReplyDelete